Ketesa service
made by etke.cc
Manage, monitor, and maintain your Matrix homeserver from one clean interface.
Ketesa (formerly Synapse Admin) is the web-based admin panel for your Matrix homeserver. It gives you full control over users, rooms, media, and server configuration — all without touching the command line. If you have never administered a Matrix server before, this is where you start.
As an etke.cc customer, Ketesa is installed on your server by default at https://matrix.your-server.com/admin, and also available at admin.etke.cc (always on the latest version). The CDN version is useful if you need a newer feature before the next maintenance window.
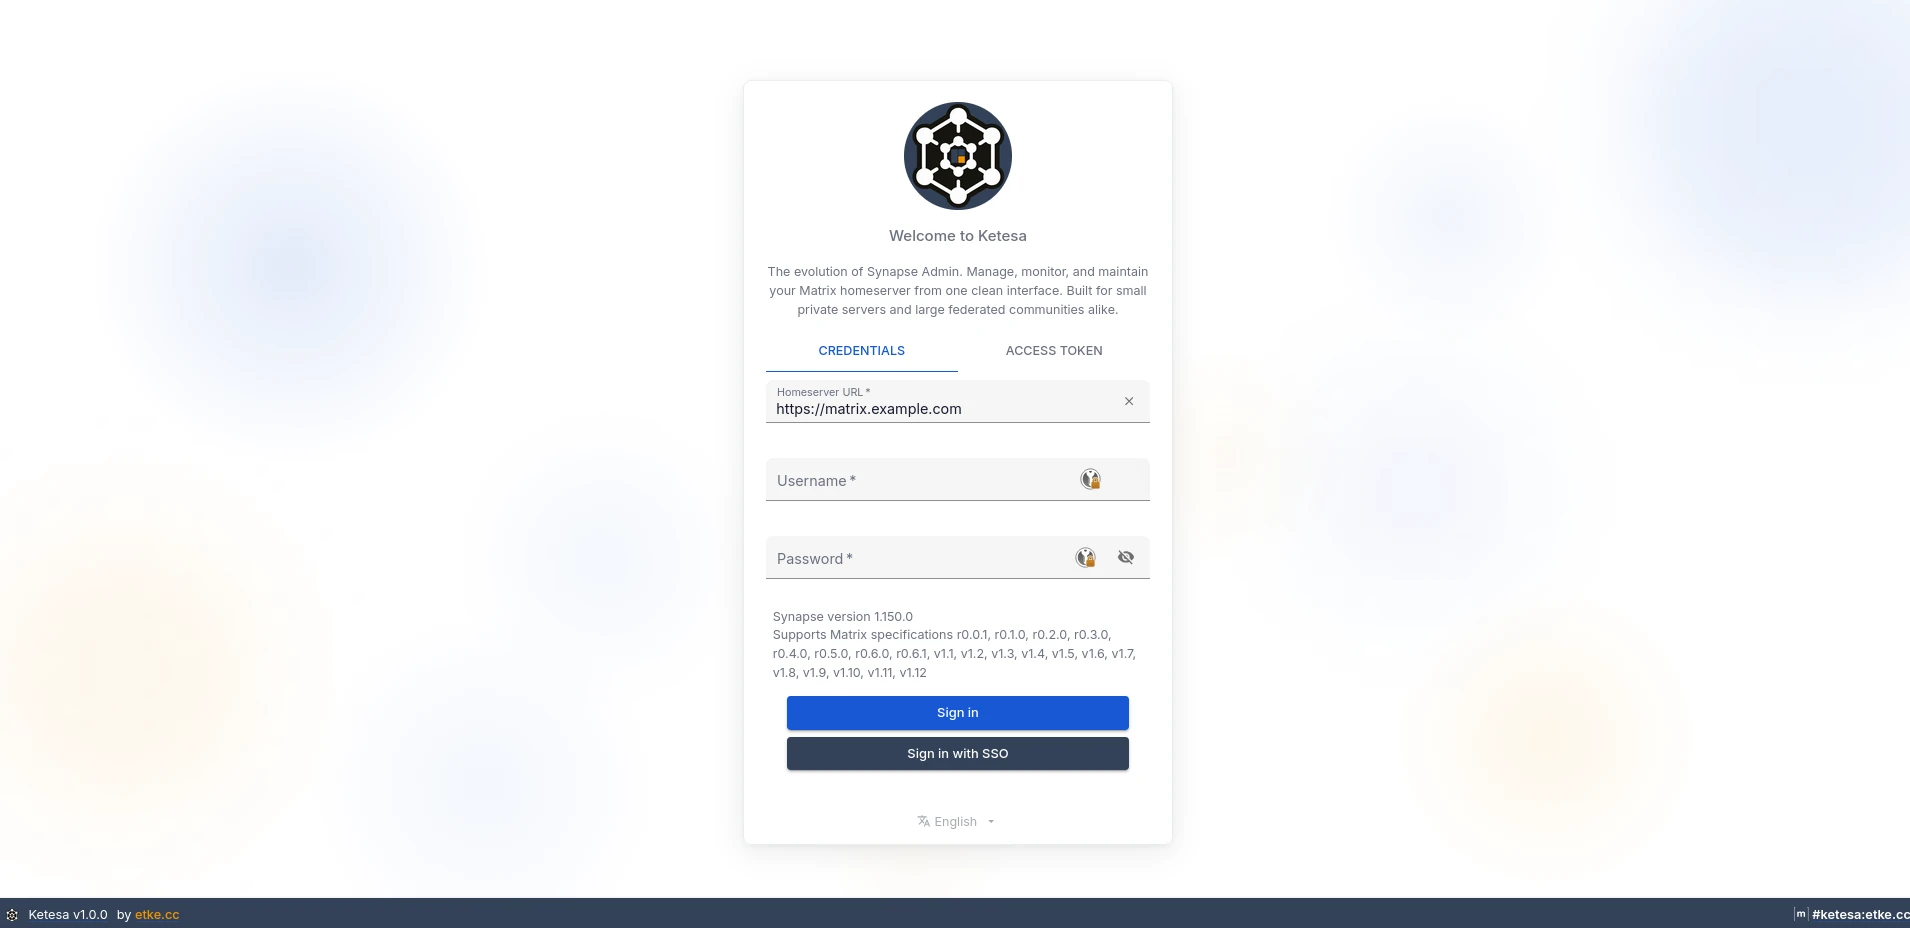
Logging In
Open the Ketesa URL and fill in:
- Username — your Matrix username (the local part, e.g.
admin, not the full@admin:your-server.com) - Password — your Matrix password
- Homeserver URL — the dropdown will show your server’s URL; select it
If you are not sure which URL to use, try
https://matrix.your-server.com/admin. Replaceyour-server.comwith your actual server domain.
User Management
The Users section is where you manage everyone on your server — from creating a new account to handling problem users.
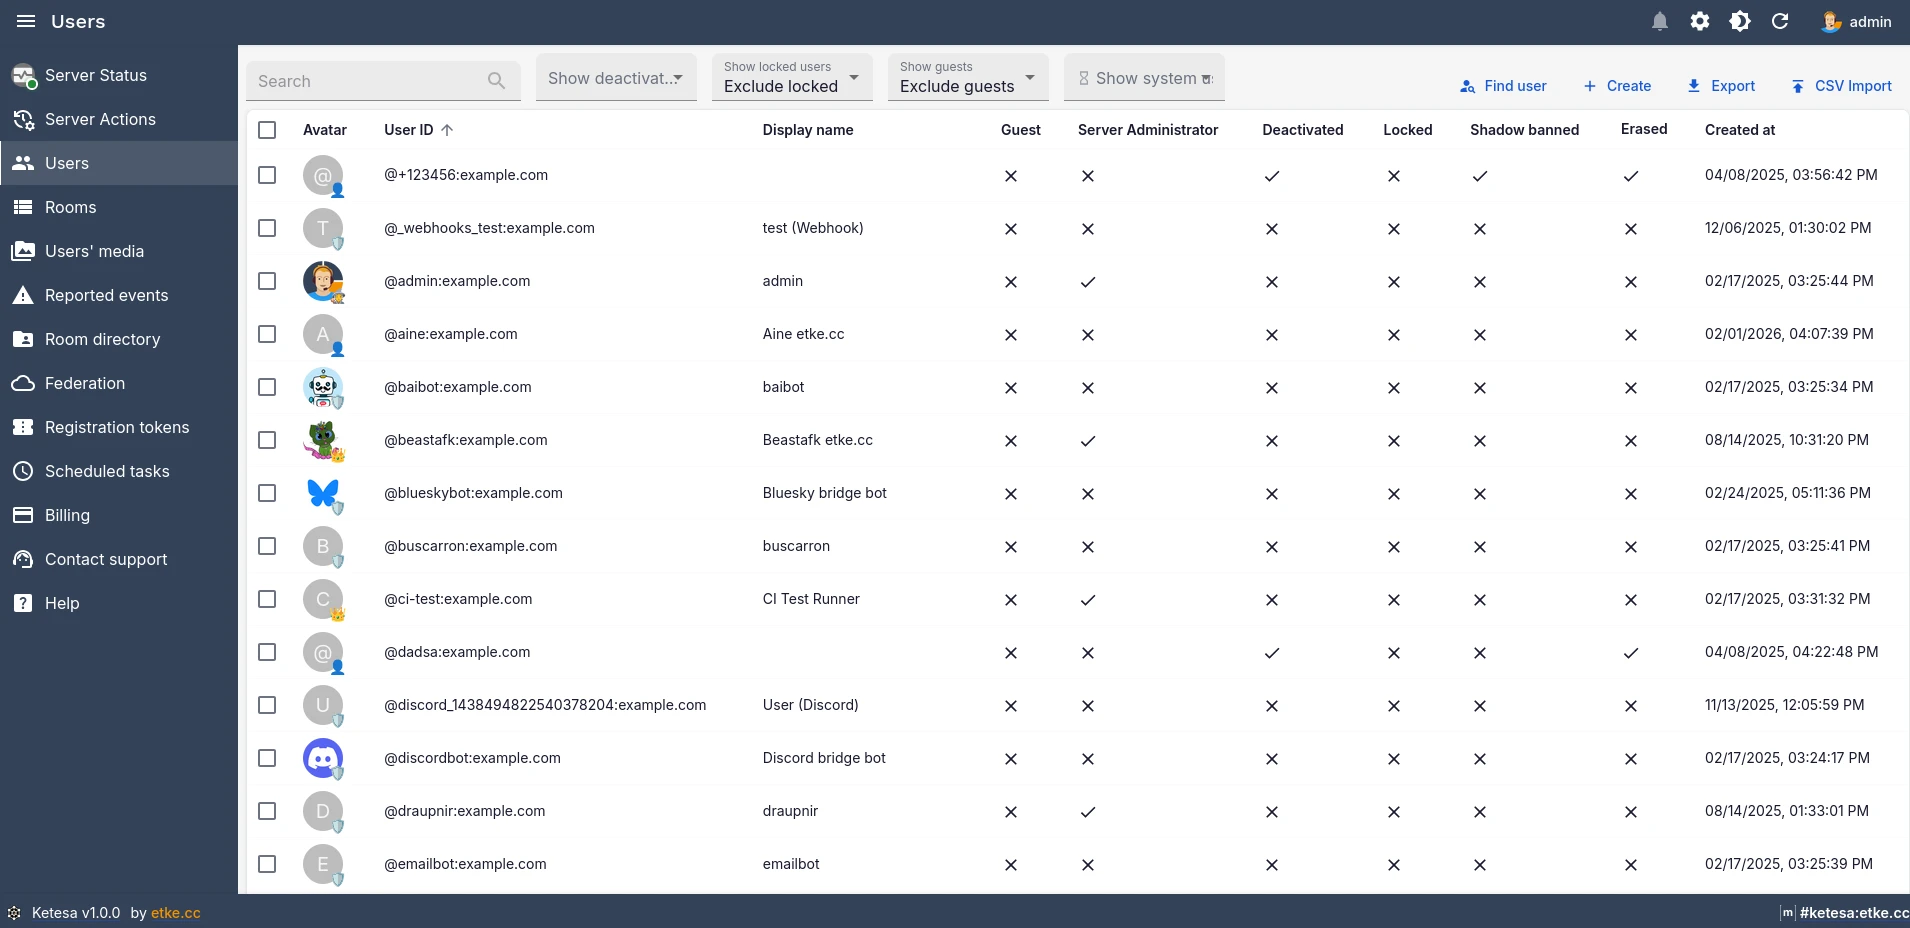
Creating a User
Click Create in the top-right corner of the Users list. Fill in the username, display name, and password. You can also set admin status and other options at creation time.
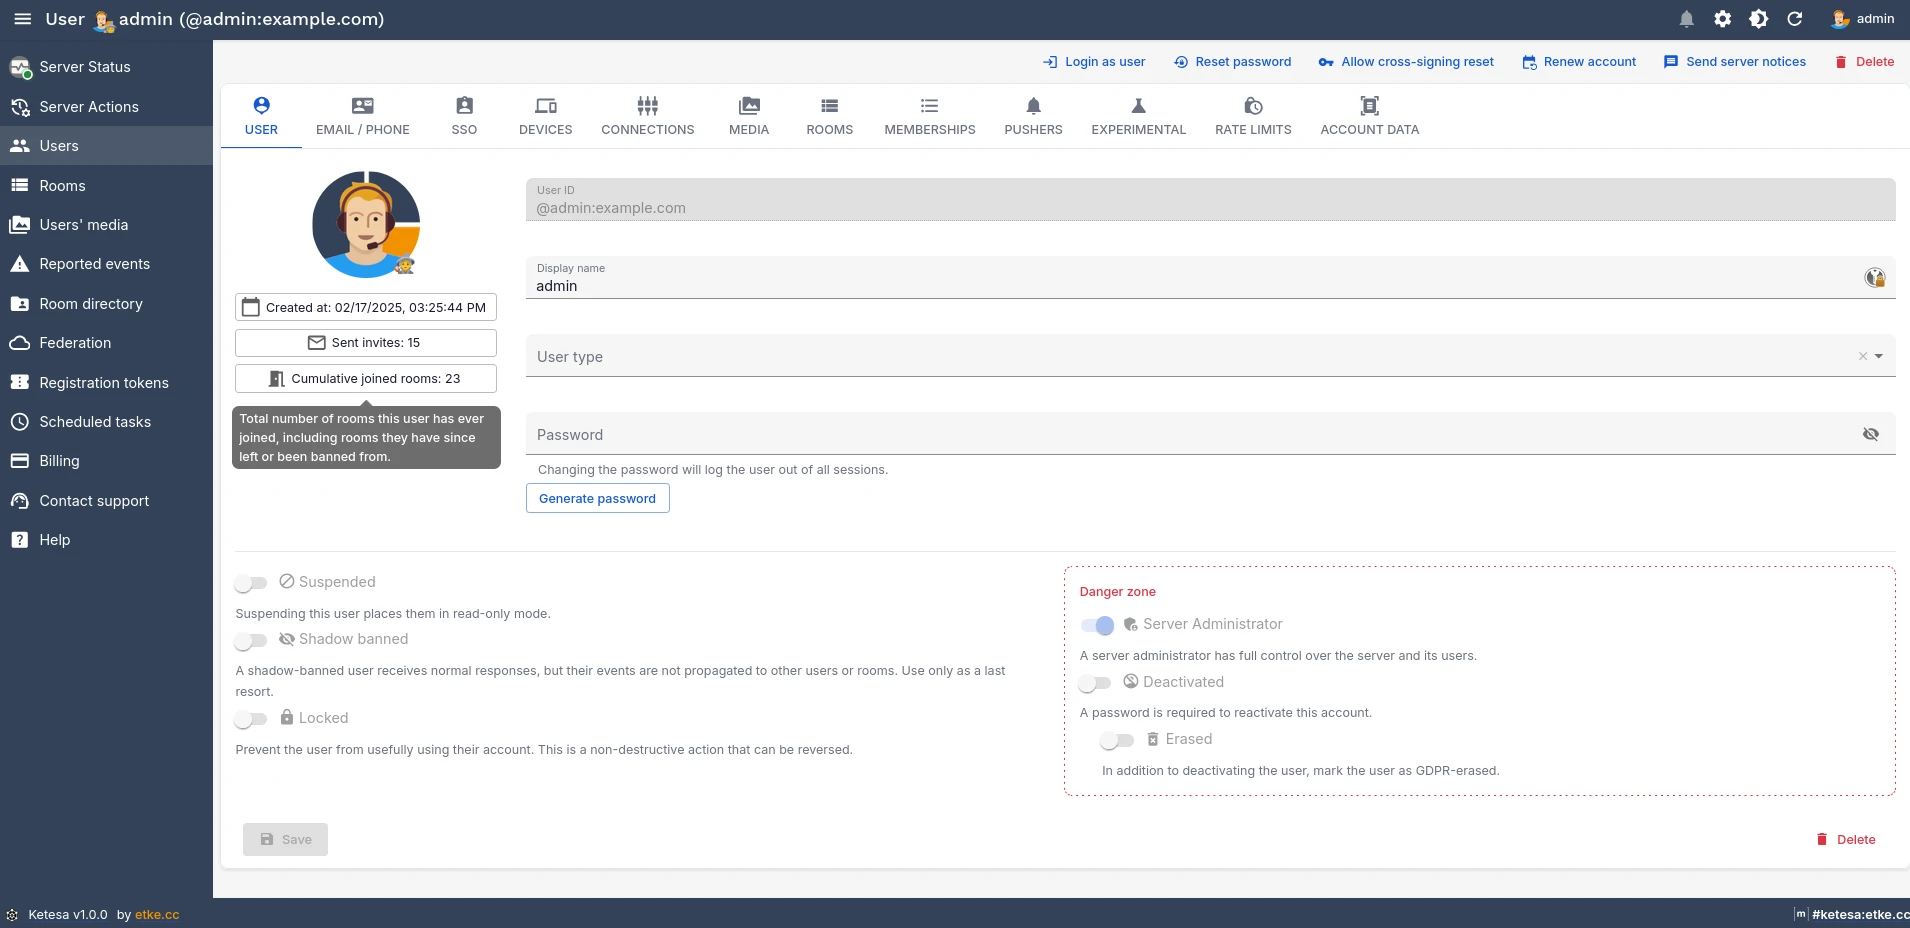
Suspending, Deactivating, or Erasing a User
Ketesa exposes two levels of account termination, accessible from the Danger Zone panel on the user edit page:
| Action | What it does | Reversible? |
|---|---|---|
| Deactivate | Disables login, invalidates all sessions, and kicks the user from all rooms. The account record and message history are preserved. | Yes — re-enable by unchecking Deactivated and setting a new password. |
| Erase | Same as deactivate, plus requests that Synapse purge the user’s messages and media from rooms. | No — message and media removal cannot be undone. |
You can also suspend a user (read-only access without full deactivation) or shadow-ban them — a shadow-banned user’s messages are silently discarded by the server without their knowledge. This is useful for handling spam accounts without alerting the operator.
Resetting a Password
Open the user’s edit page and click Reset password in the top toolbar. You can set a specific password or generate a random one.
Managing Devices
The Devices tab on the user edit page lists all connected clients. You can rename individual devices or bulk-remove selected ones — useful when a user has lost a device or has stale sessions accumulating.
Role Badges
User avatars in the list carry badges: admin, bot, support, federated, system-managed. These let you identify account types at a glance without opening each record.
Rate Limits
If a user is hitting rate limits, you can override the server-wide defaults per user from the Rate limits section on the edit page. Set messages_per_second and burst_count to higher values for bot accounts or power users. Clear both fields to return the user to the server default.
Server Notices
You can send a broadcast message to one or multiple users through Matrix’s server notices system — it appears as a Matrix message from the server bot.
- Single user: Open the user edit page → Send server notice in the toolbar.
- Multiple users: Select users in the list → Send server notice in the bulk actions bar.
Server notices require the
server_noticesfeature to be configured in your homeserver. If it is not set up, contact us to enable it.
Bulk Registration via CSV
To create many accounts at once, use the CSV import. Click Import in the Users section sidebar, or the CSV IMPORT button in the list toolbar.
Prepare a .csv file with at minimum these columns:
id,displayname,password,admin,is_guest,deactivated
alice,Alice Example,s3cr3t,false,false,false
bob,Bob Example,,false,false,false
| Column | Required | Description |
|---|---|---|
id | Yes | The local part of the Matrix ID (e.g. alice for @alice:your-server.com), or a full MXID |
displayname | Yes | The user’s display name |
password | No | Plaintext password; a random one is generated if empty |
admin | No | true/false — grant server admin status |
is_guest | No | true/false — mark as a guest account |
deactivated | No | true/false — create the account already deactivated |
avatar_url | No | mxc:// URI for the user’s avatar |
threepids | No | Comma-separated list of identifiers, e.g. email:alice@example.com |
Before running a real import, always do a dry run first (the Simulate only checkbox). It runs the same logic without creating any accounts, so you can catch format errors safely.
Conflict modes — what happens if a user ID from the CSV already exists:
- Stop (default) — halt immediately at the first conflict
- Skip — skip conflicting rows and continue; skipped records can be downloaded as a CSV for re-processing
Room Management
The Rooms section gives you full visibility into every room on your server, including the ability to moderate, restructure, and inspect them.

Opening a Room
Click any room in the list to open its detail view. Tabs at the top give you access to different aspects: Members, State, Messages, Hierarchy (Spaces only), and Media.
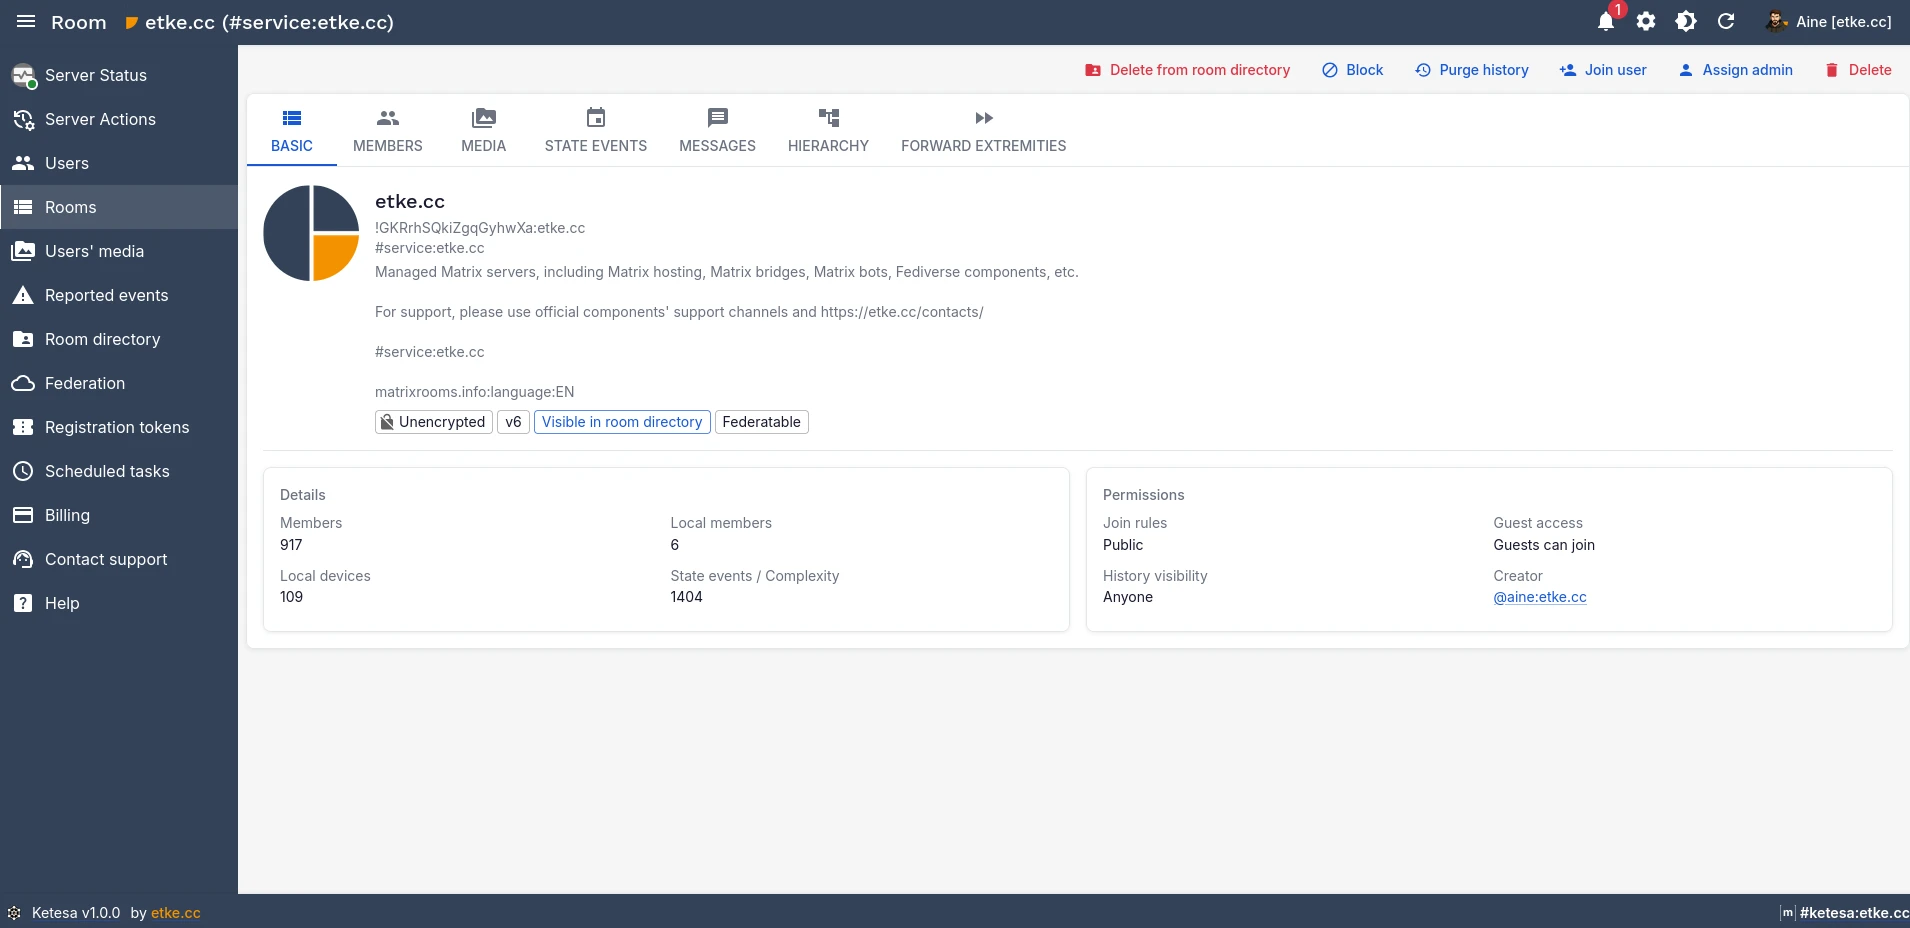
Blocking a Room
Block prevents any new user from joining the room. Existing members are not kicked. Use this to stop a harmful room from growing while you investigate.
- To block: open the room → click Block in the toolbar.
- To block by room ID without opening it: use the Block room by ID button in the Rooms list toolbar.
- To unblock: click Unblock in the same toolbar.
Blocking does not remove existing members. Use Delete room if you want to remove members and prevent access entirely.
Deleting a Room
Permanently removes the room — all members are kicked, the room is blocked, and local event data is purged. This cannot be undone. Open the room → Delete room in the toolbar.
Purging History
Deletes all events in a room before a specified date. The room and its members are unaffected — only the event history is removed. Useful for reclaiming disk space or complying with retention policies.
- Open the room → Purge history in the toolbar.
- Set the cutoff date. Optionally enable Also delete events sent by local users.
- Confirm. Large rooms may take time — you can close the dialog while it runs in the background.
Joining a User to a Room
Adds any Matrix user (local or federated) to the room as if they had been invited and accepted.
Open the room → Join user → enter the full MXID (e.g. @alice:example.com) → Join.
Assigning a Room Admin
Grants a user the highest power level in the room.
Open the room → Assign admin in the toolbar or the Members tab → enter the MXID → Make admin.
Browsing Room Messages
The Messages tab shows paginated room history with filters and a jump-to-date navigator.

- Browse: click Load older / Load newer to paginate (20 events at a time).
- Jump to date: fill in the Jump to date field and choose a direction (Backward lands just before, Forward just after). The nearest event is highlighted.
- Filter by type: expand Filters → pick from the event type dropdown (e.g.
m.room.messagefor text messages only). - Filter by sender: expand Filters → enter a Matrix user ID in Senders.
- Exclude: expand Advanced filters to hide specific event types or senders.
Browsing Spaces (Room Hierarchy)
If the room is a Space, the Hierarchy tab shows its full nested room tree with expandable nodes.
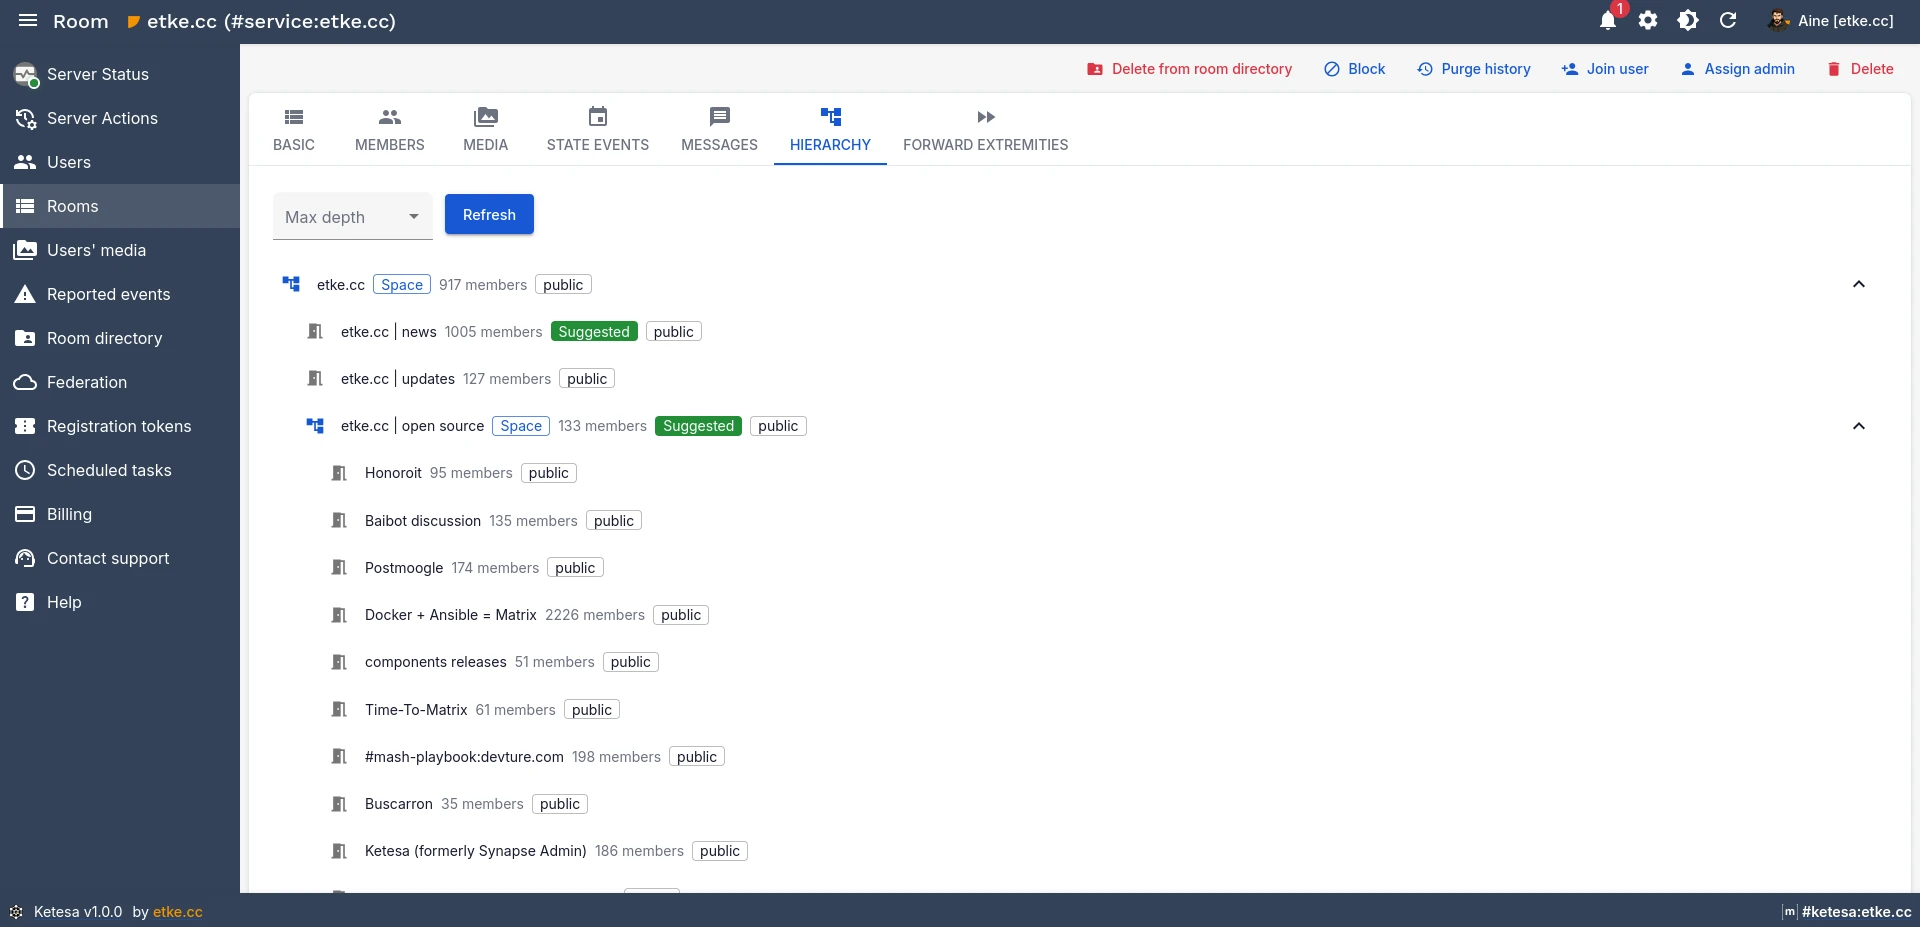
The first two levels expand automatically. Click any node to expand or collapse it. Click a leaf room to navigate to its detail view. Use Max depth to limit how many nesting levels are fetched — useful for very large Spaces.
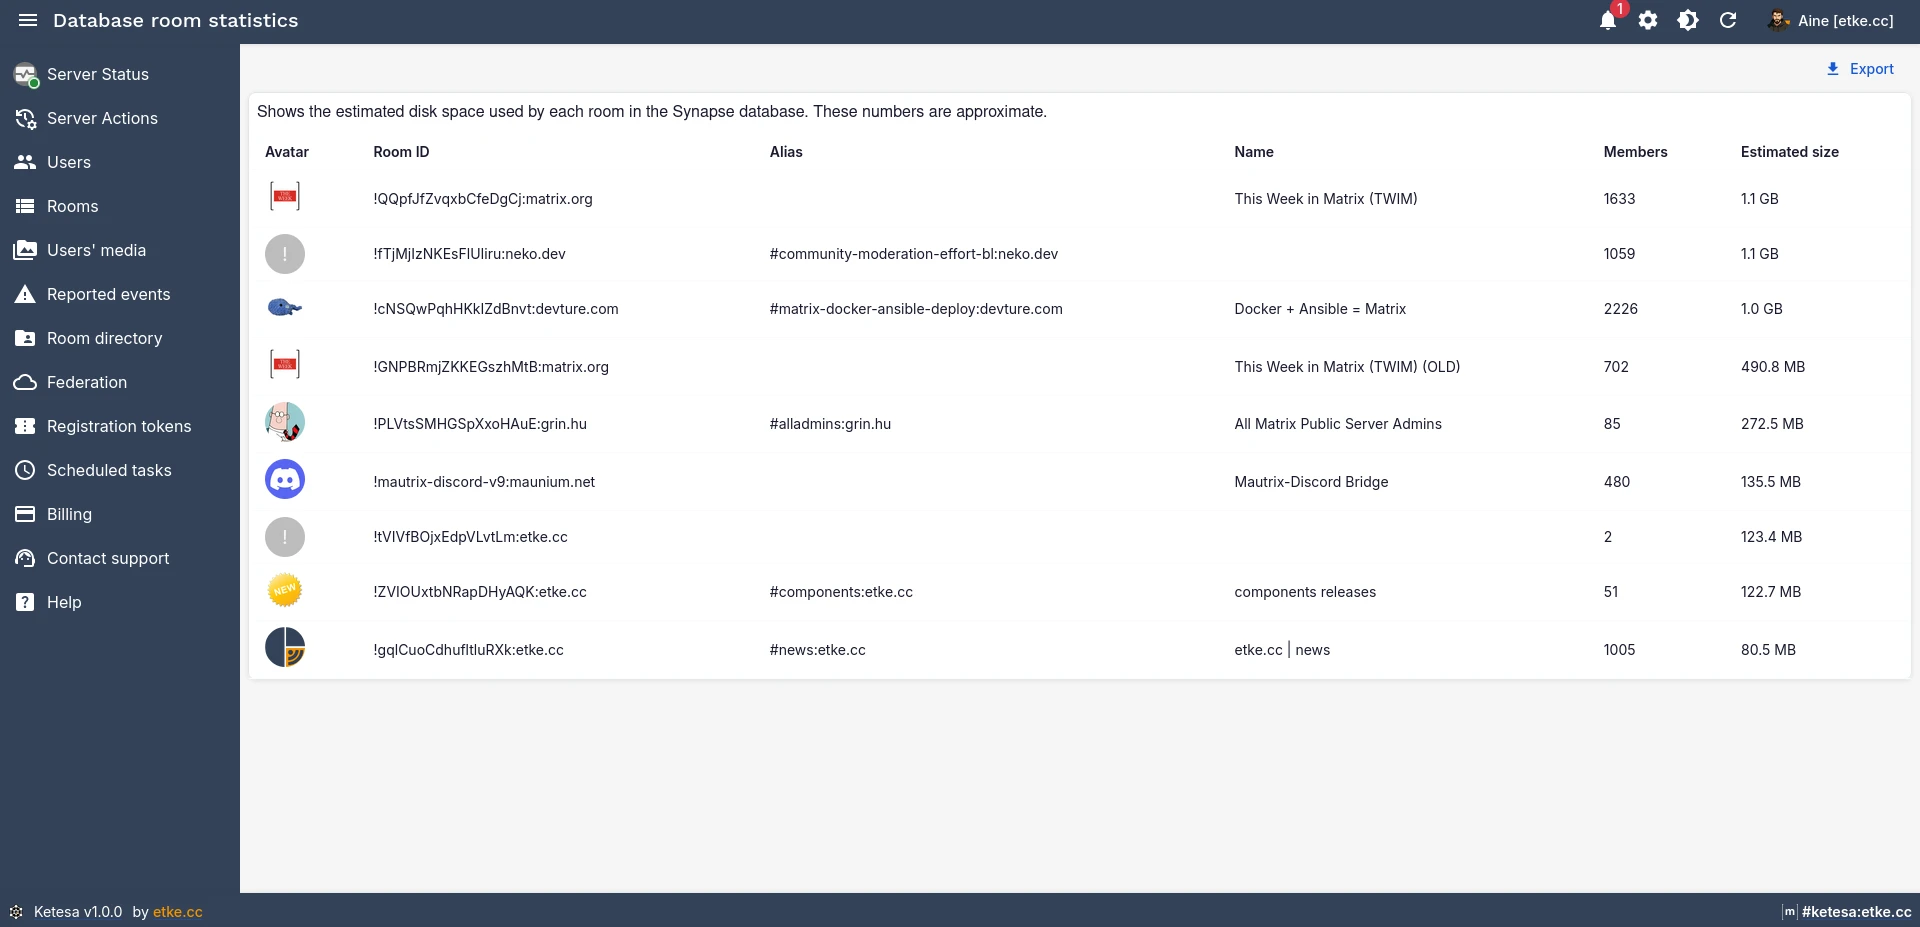
Room Statistics
The Rooms section includes a Statistics view with per-room database size and event counts — useful for identifying rooms that are consuming the most storage.
Room Directory
The Room Directory view lists which rooms on your server are published in the public directory. You can publish or unpublish rooms from here, or directly from each room’s detail view.
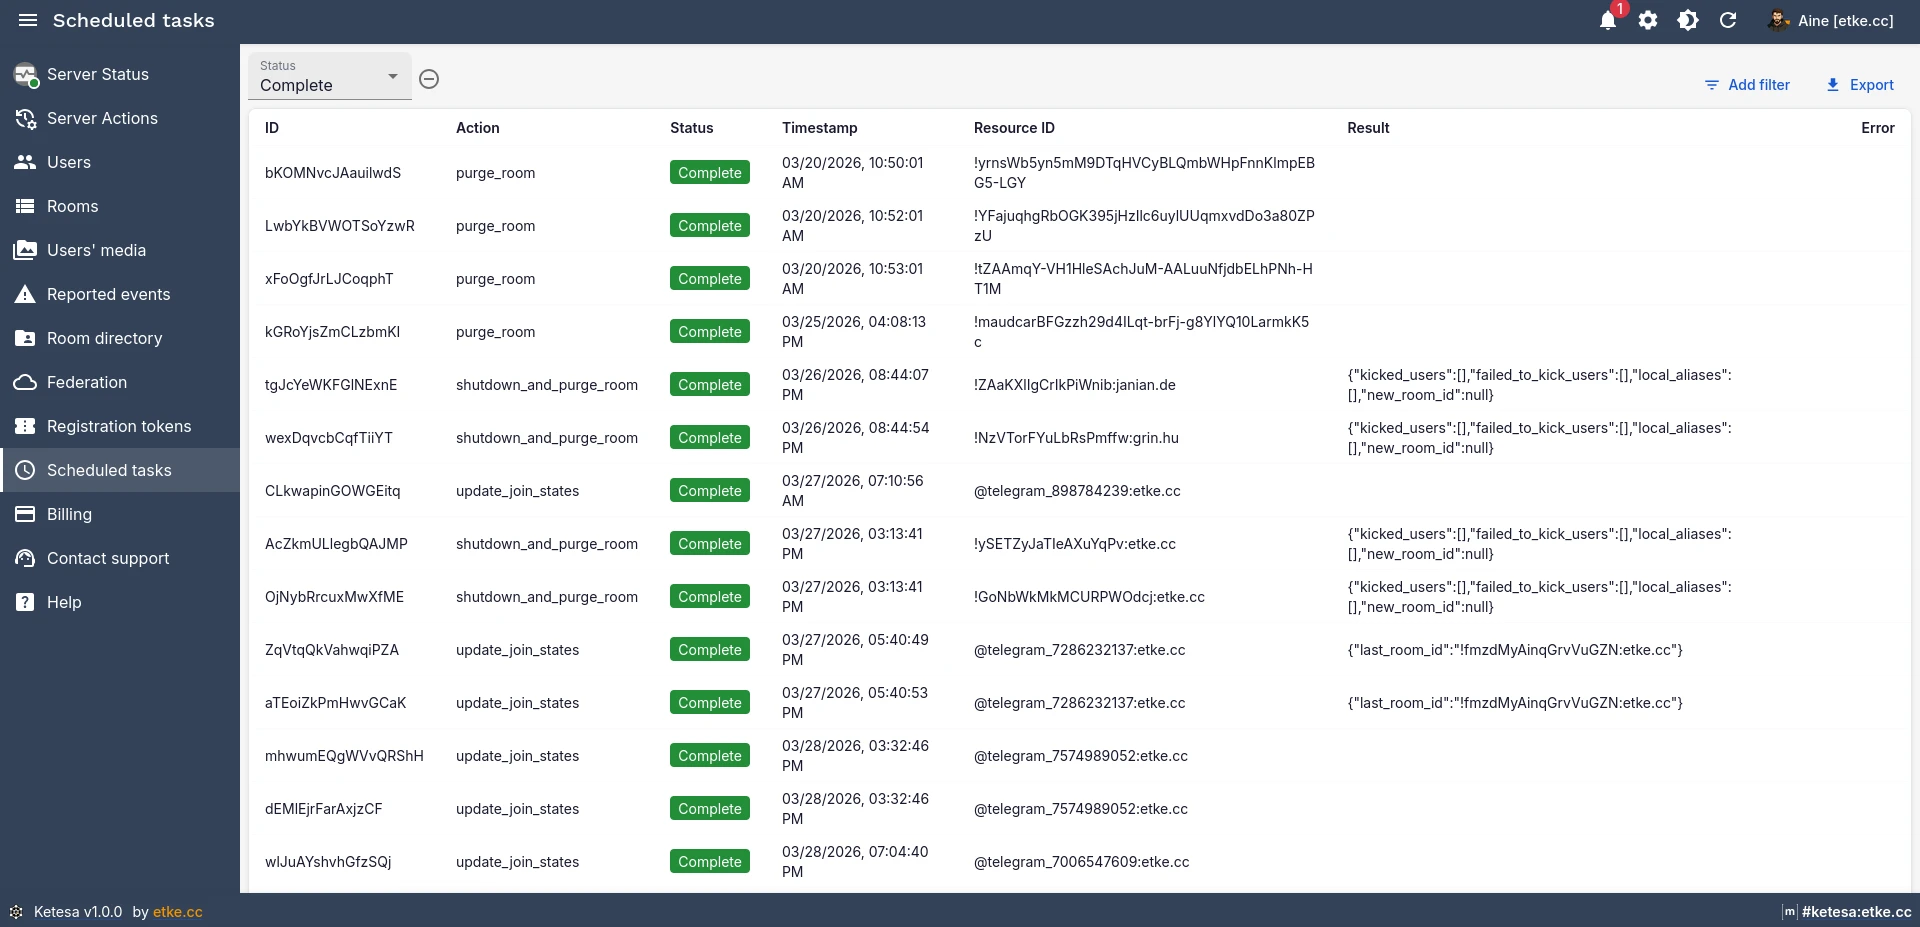
Scheduled Tasks
The Scheduled Tasks list shows pending Synapse background jobs — maintenance operations like state compression or media cleanup that are queued or running on the server.
Media Management
Ketesa gives you granular control over media at the file, user, and room level.
| Operation | What it does | Reversible? |
|---|---|---|
| Quarantine | Blocks access to the file for all users | Yes (unquarantine) |
| Protect | Prevents the file from being quarantined | Yes (unprotect) |
| Delete | Permanently removes the file from the server | No |
| Purge remote cache | Removes locally cached copies of media from other servers | No |
Quarantining or Deleting a Specific File
- Open the user who uploaded the file → Edit → Media tab.
- Find the file. Use Quarantine to block access, or Delete to remove it permanently.
- To quarantine all media for a user at once: click Quarantine all media at the top of the tab.
You can also quarantine all media in a room: open the room → Media tab → Quarantine all media.
Freeing Up Disk Space (Delete Local Media)
Navigate to Media → Delete media in the toolbar.
| Option | Description |
|---|---|
| Last access before | Only delete media not accessed since this date |
| Larger than (in bytes) | Only delete files above this size |
| Keep profile images | When on, user avatars are excluded (default: on) |
Always run with conservative filters first (recent cutoff + large size threshold) before doing a broad sweep. Deleted media cannot be recovered.
Purging Remote Media Cache
Your server caches media (avatars, images, files) from other Matrix servers it federates with. Over time this cache can grow large.
Navigate to Media → Purge remote media → set Last access before → confirm.
This only removes your server’s local copies. The originals on remote servers are untouched, and remote users can re-fetch media after the purge.
Moderation (Event Reports)
When Matrix users flag a message as harmful in their client app, a report is created on your homeserver. The Event Reports section in Ketesa lets you review these.
Each report shows: who reported it, which room and event was flagged, the reporter’s severity score (−100 most severe to 0 least), and the reason text. Click a report to see the full event content and decide what action to take.
After reviewing, click Resolve to dismiss the report.
See also: Moderation guide
Registration Tokens
Registration tokens are invite codes that users must provide during sign-up. They let you control who can join without opening registration entirely. See invite-based registration for context.
Navigate to Registration Tokens in the sidebar to manage them.
Creating a Token
Click Create. All fields are optional:
| Field | Description |
|---|---|
token | Custom token string (up to 64 characters). Left empty = auto-generated. |
uses_allowed | Maximum number of registrations. Left empty = unlimited. |
expiry_time | When the token expires. Left empty = never. |
Revoking or Deleting Tokens
- Synapse backend: use Delete to permanently remove a token.
- MAS backend: use Revoke to disable a token without deleting it (preserves usage history). Use Unrevoke to re-enable it.
The token list defaults to showing only valid (usable) tokens. Clear or toggle the Valid filter to see expired or exhausted tokens.
etke.cc-Exclusive Features
The following features are only available on etke.cc-managed servers.
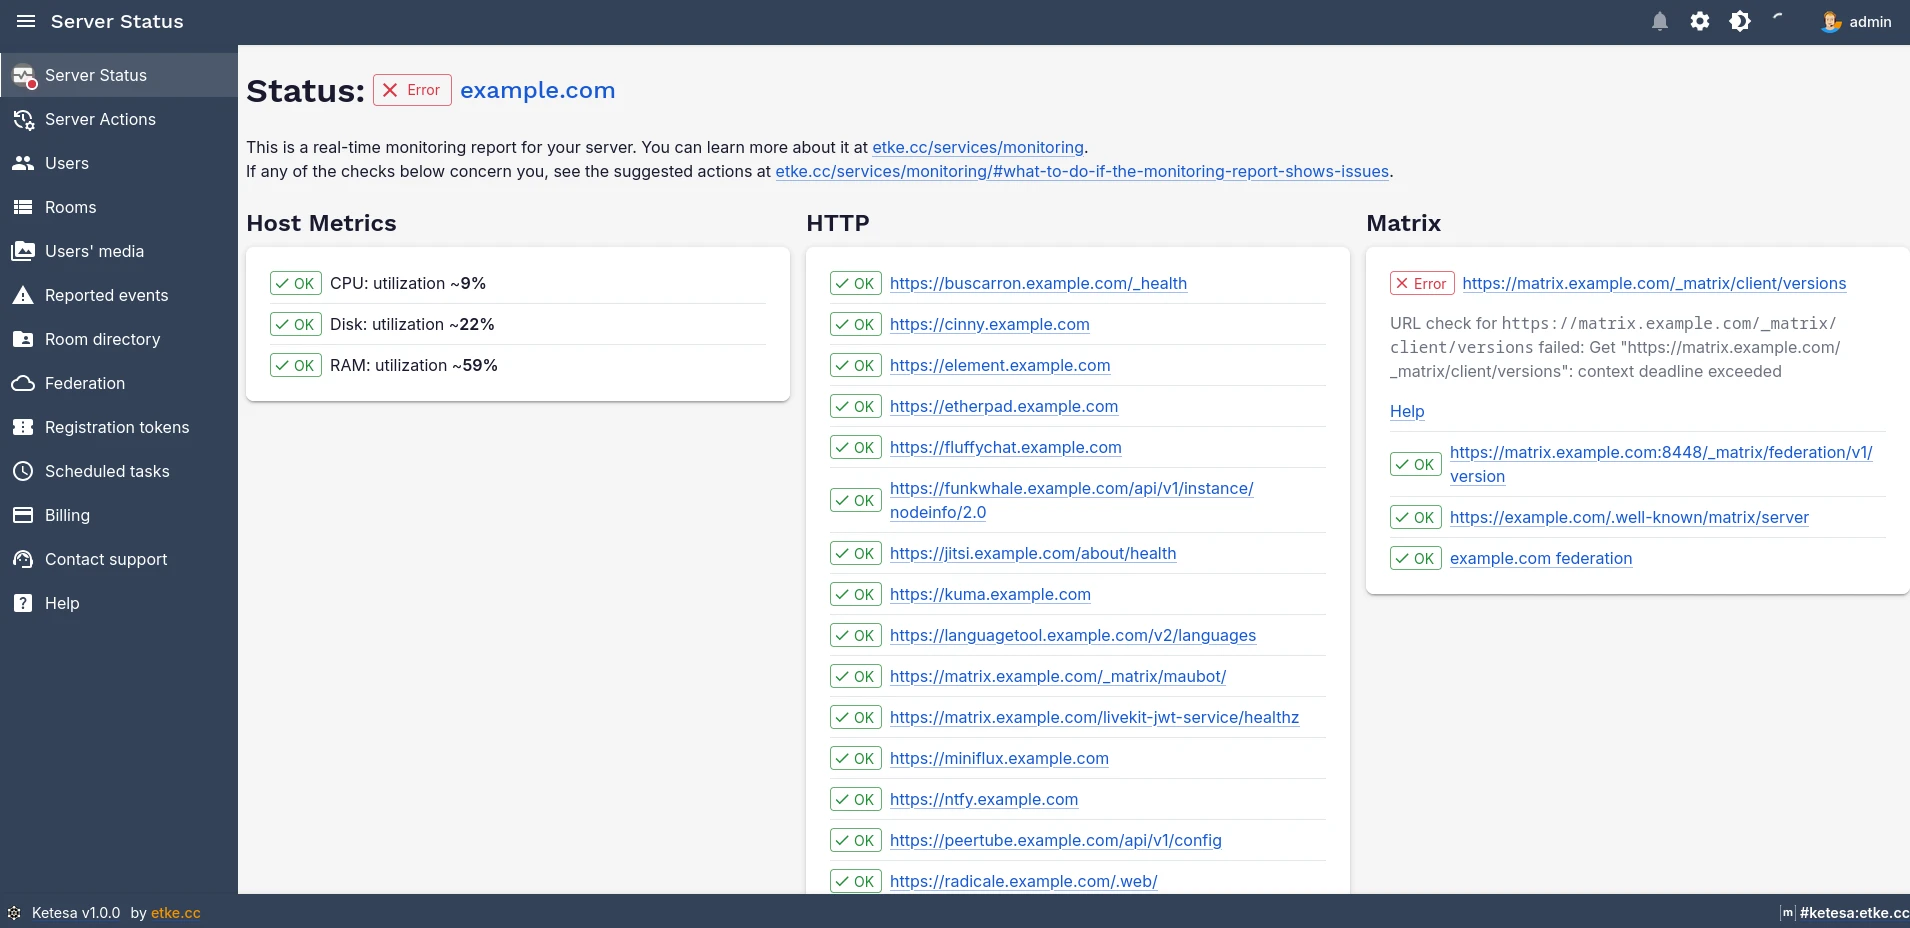
Server Status
Monitor your server’s health in real time. A live status badge is always visible in the toolbar. Click it to open the full Server Status page, which shows every component with color-coded indicators, error details, and suggested actions — so you know what’s wrong before your users do.
See also: Monitoring service
Server Actions
Trigger management commands on demand, schedule them for a specific date and time, or set up recurring weekly jobs — all without SSH access. Routine maintenance becomes a few clicks.
- Run immediately — executed in the background; view status and output in real time
- Schedule — pick a date and time for a one-off run
- Recurring — set a weekly schedule for regular maintenance tasks
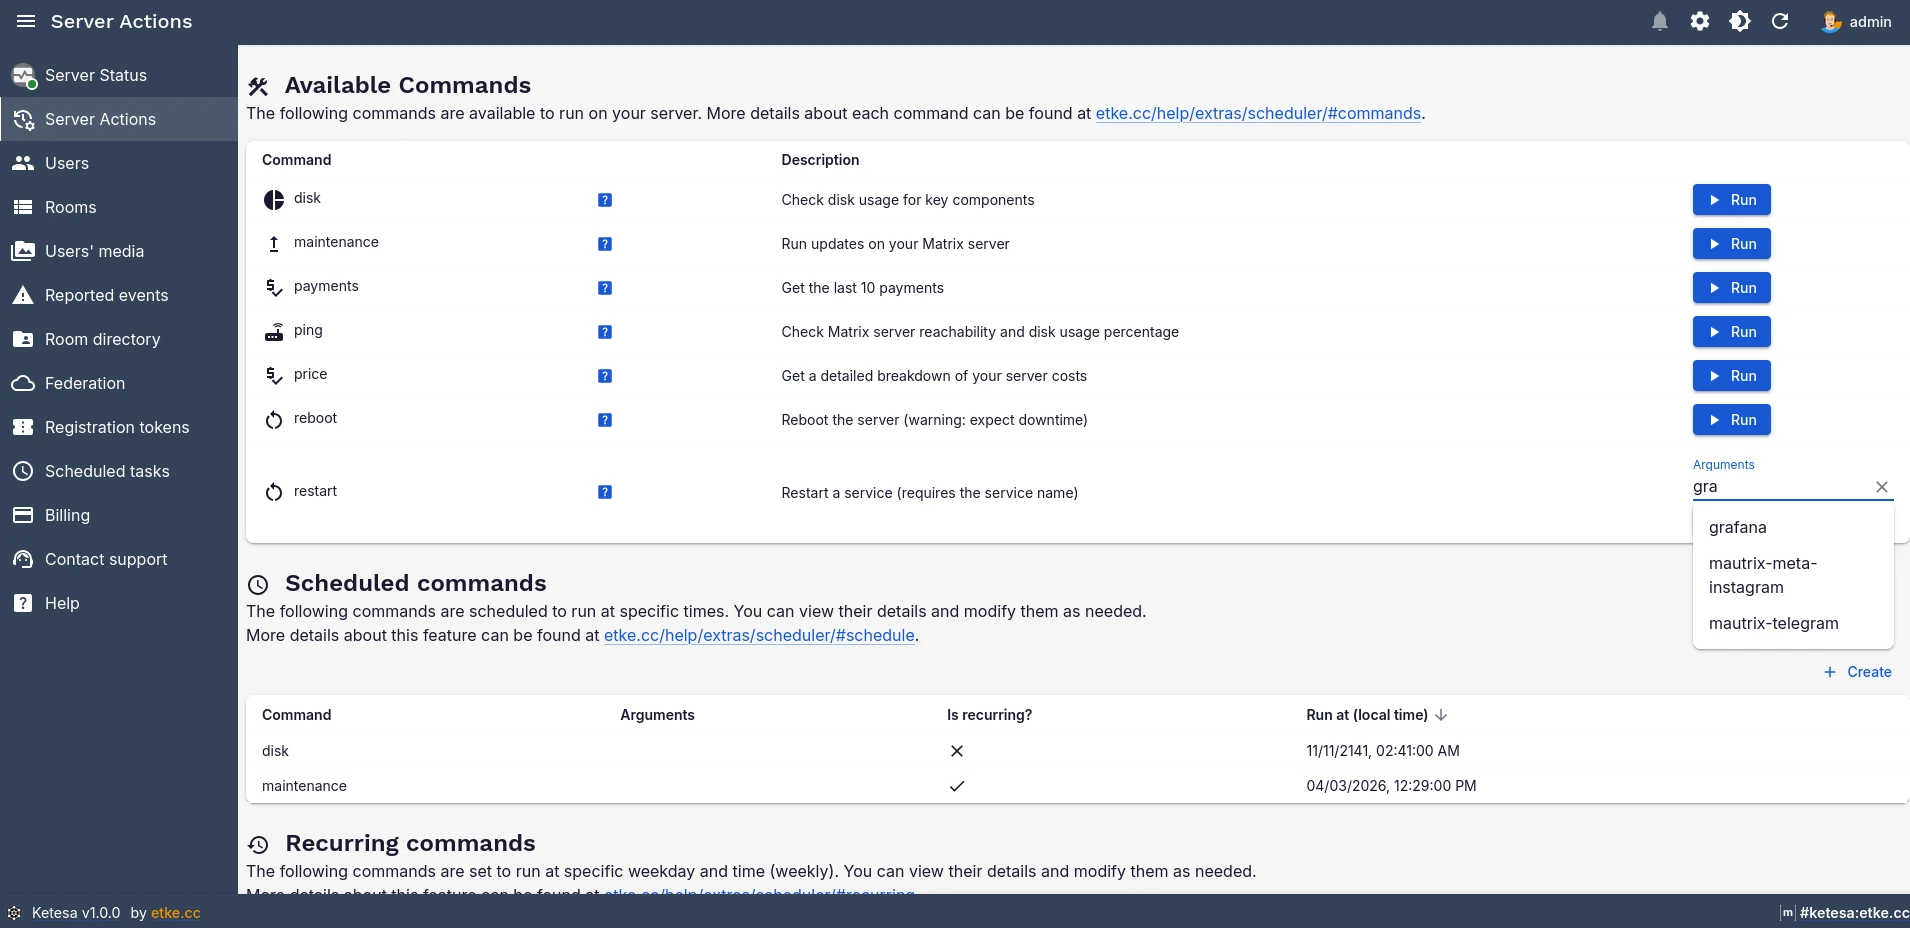
See also: Scheduler
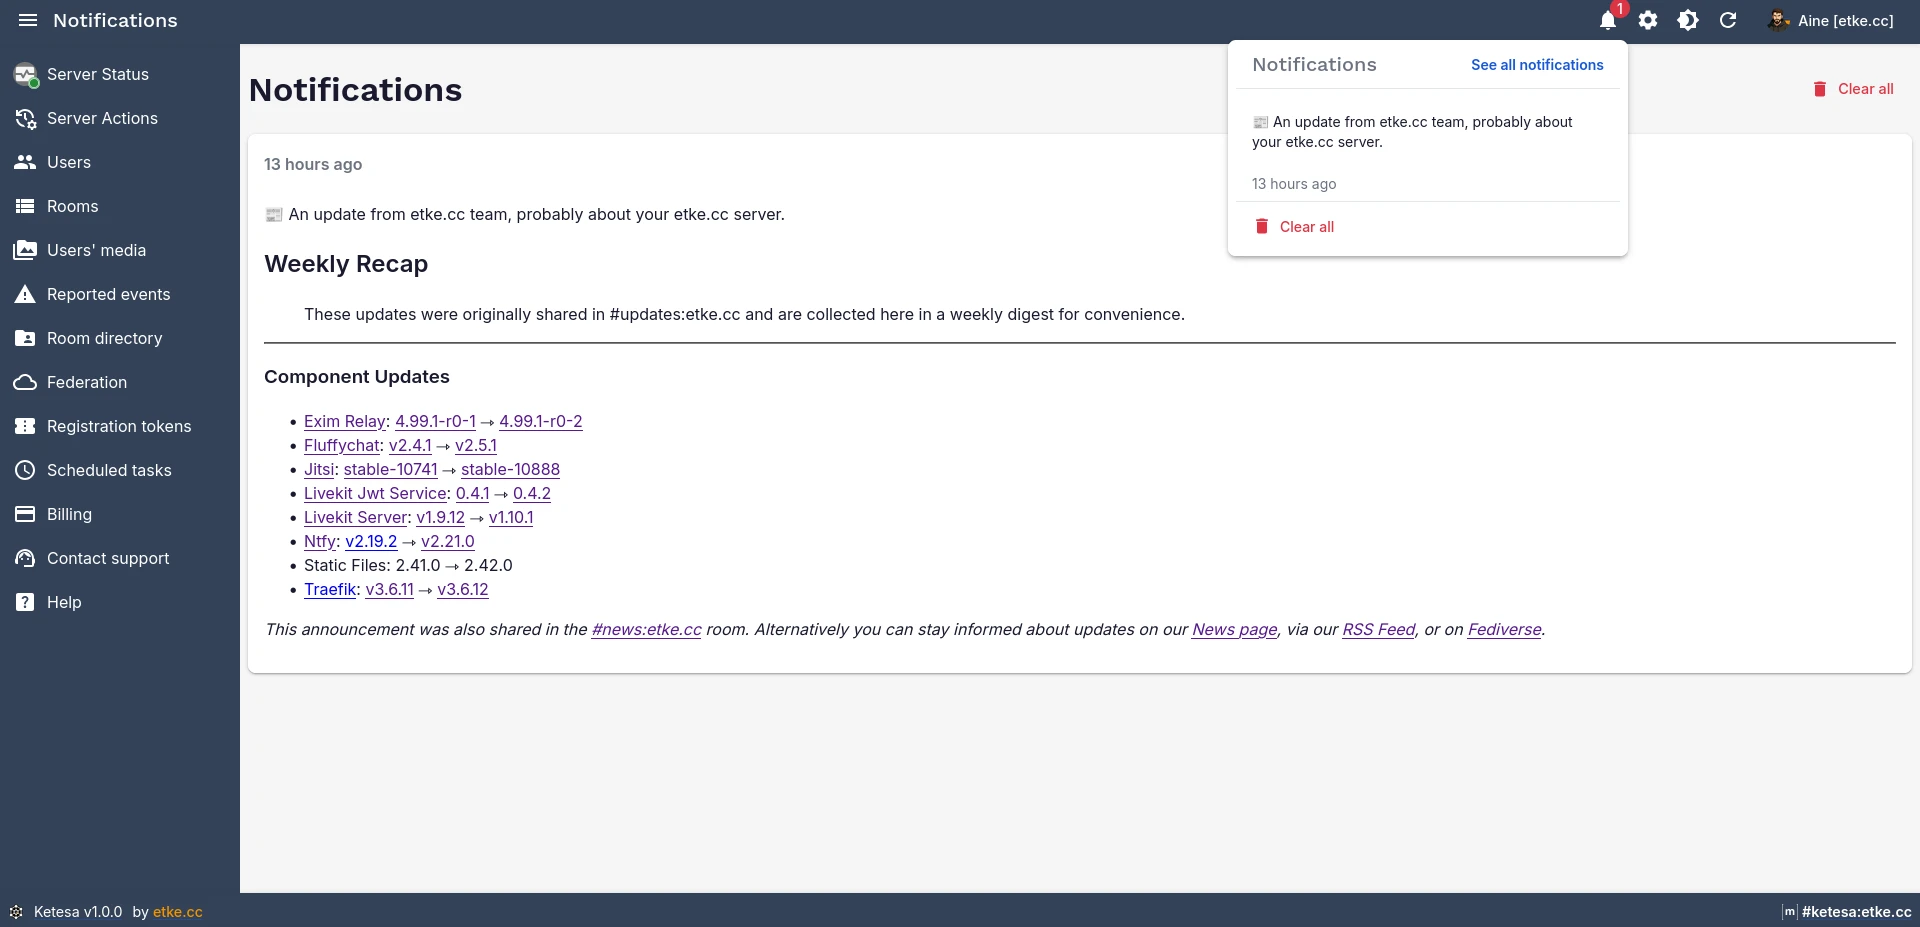
Server Notifications
Important server events surface as an in-app notification feed with an unread badge — health alerts, pending updates, and overdue payment reminders all in one place. Nothing slips through.
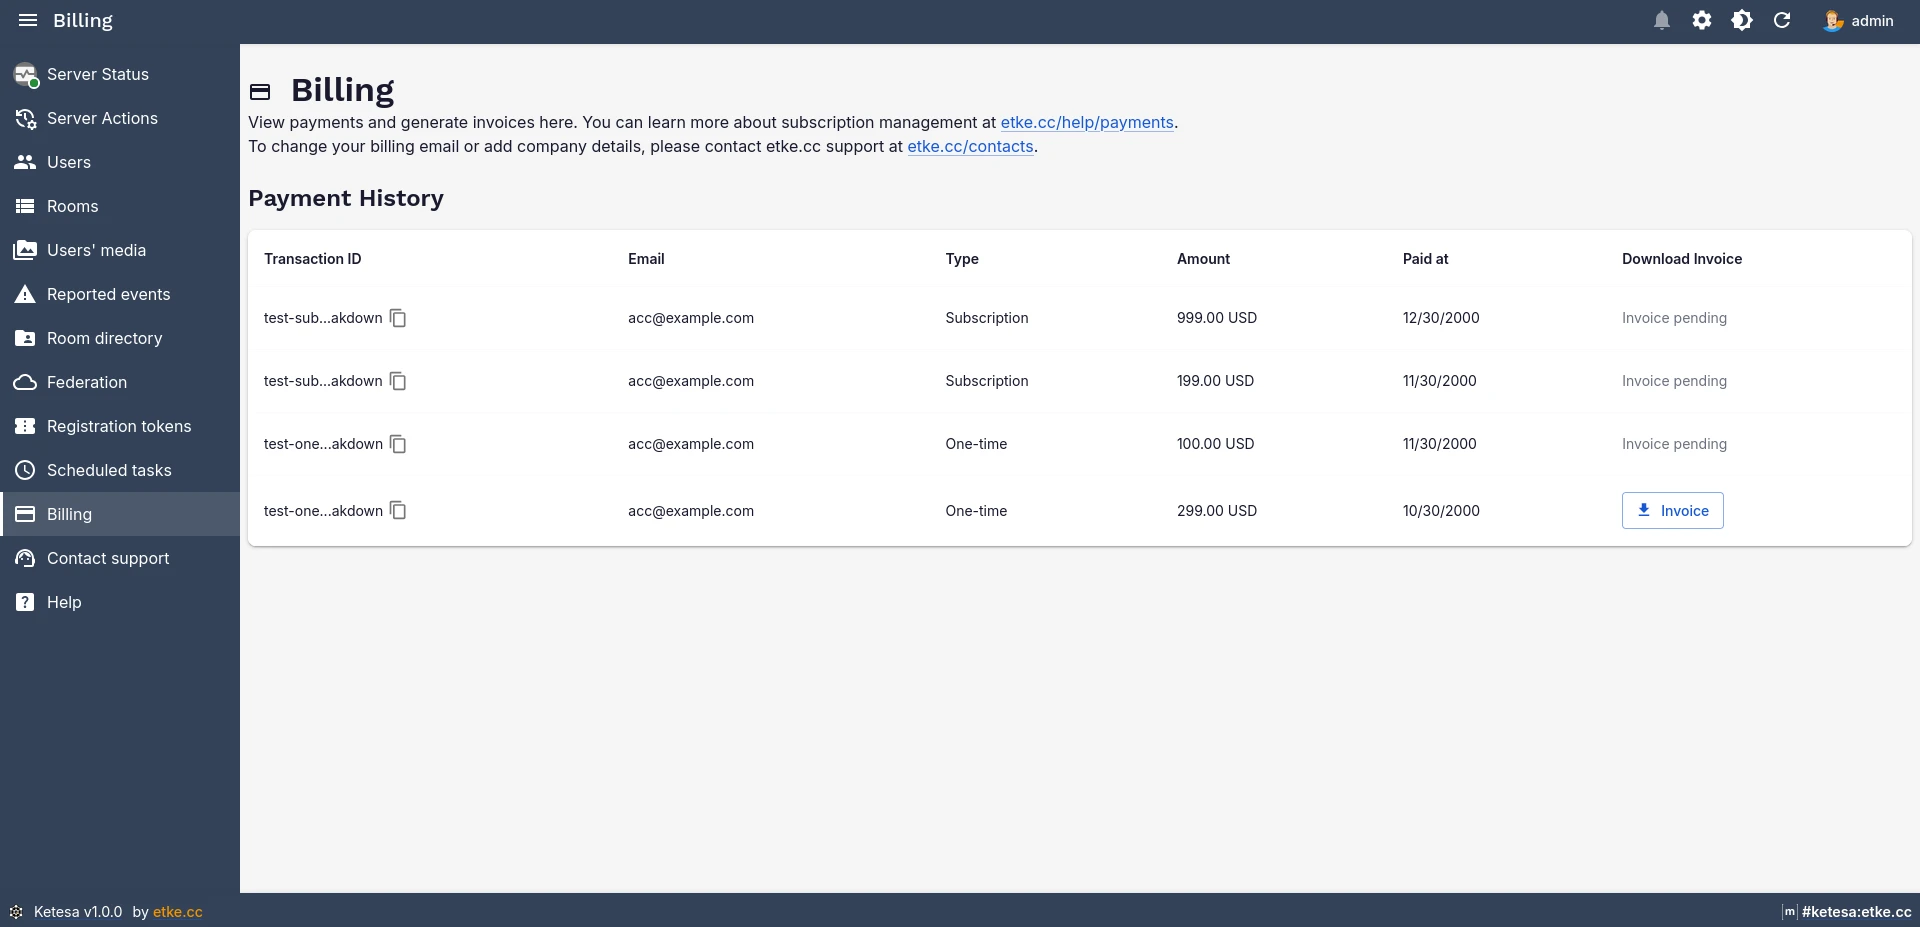
Billing
View your payment history and download invoices without ever leaving the admin panel. The Billing page shows successful payments with transaction details, payment type, amount, and date.
Prices include VAT. For questions about billing, see the Payments page or contact us.
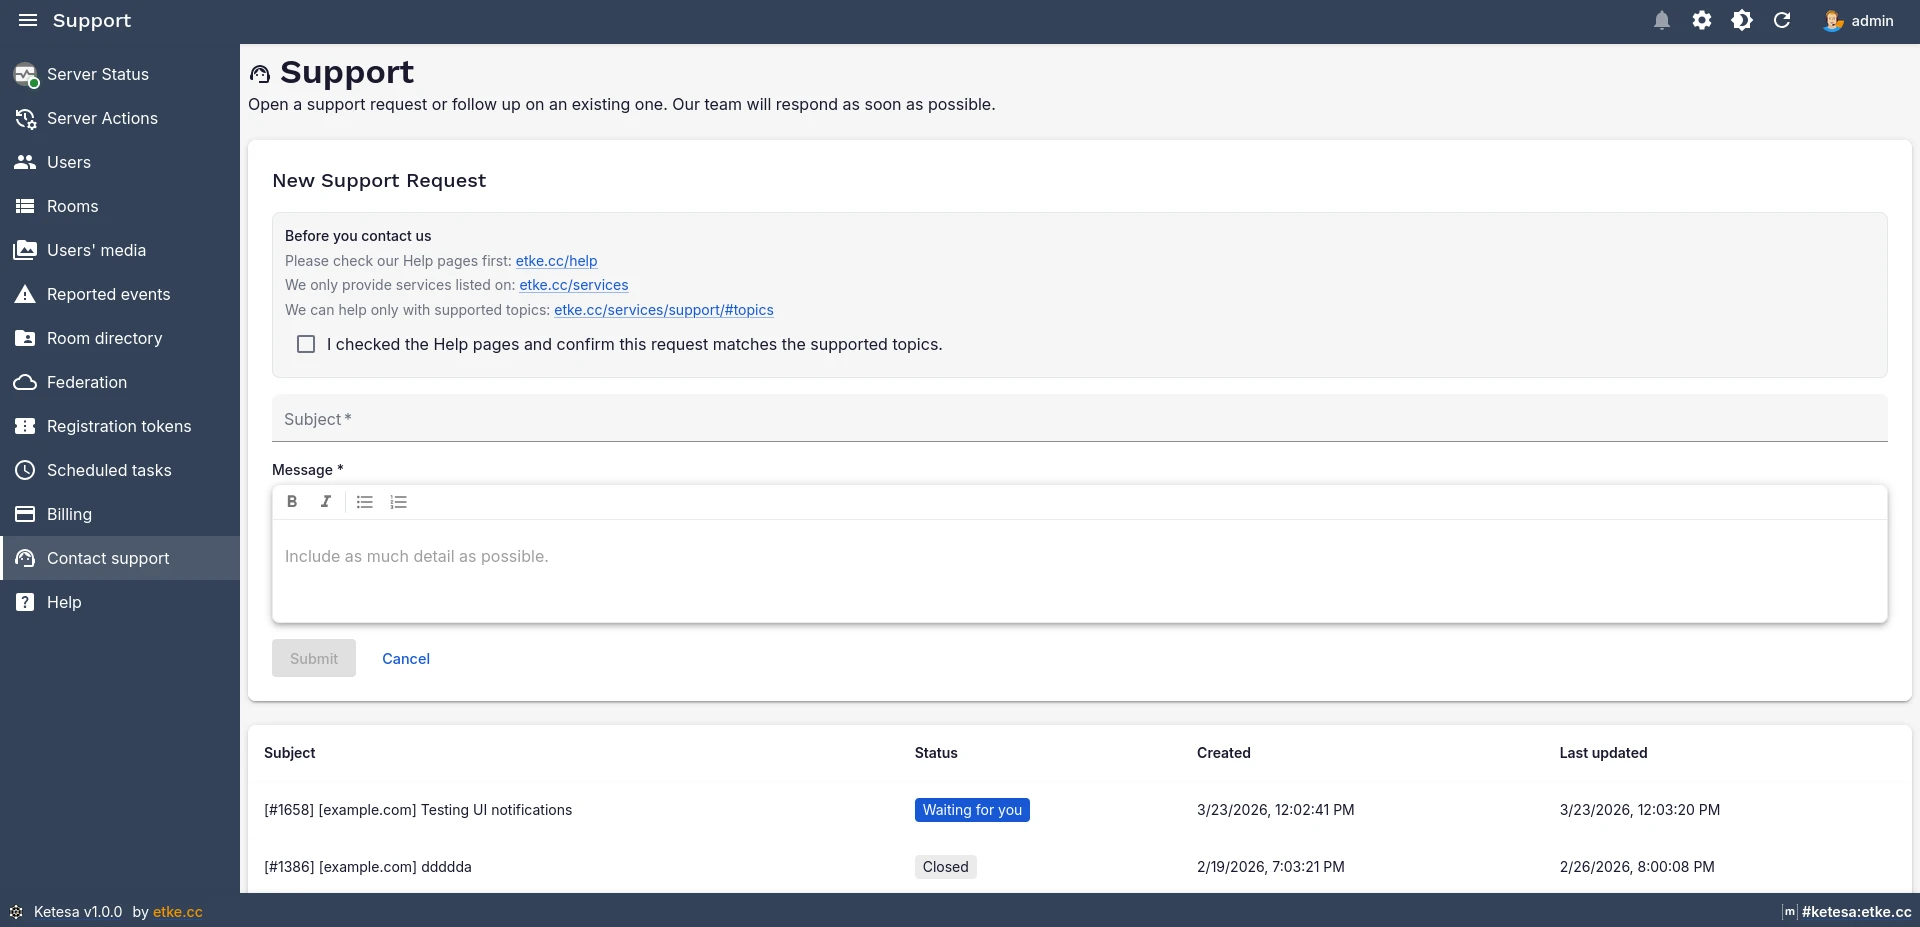
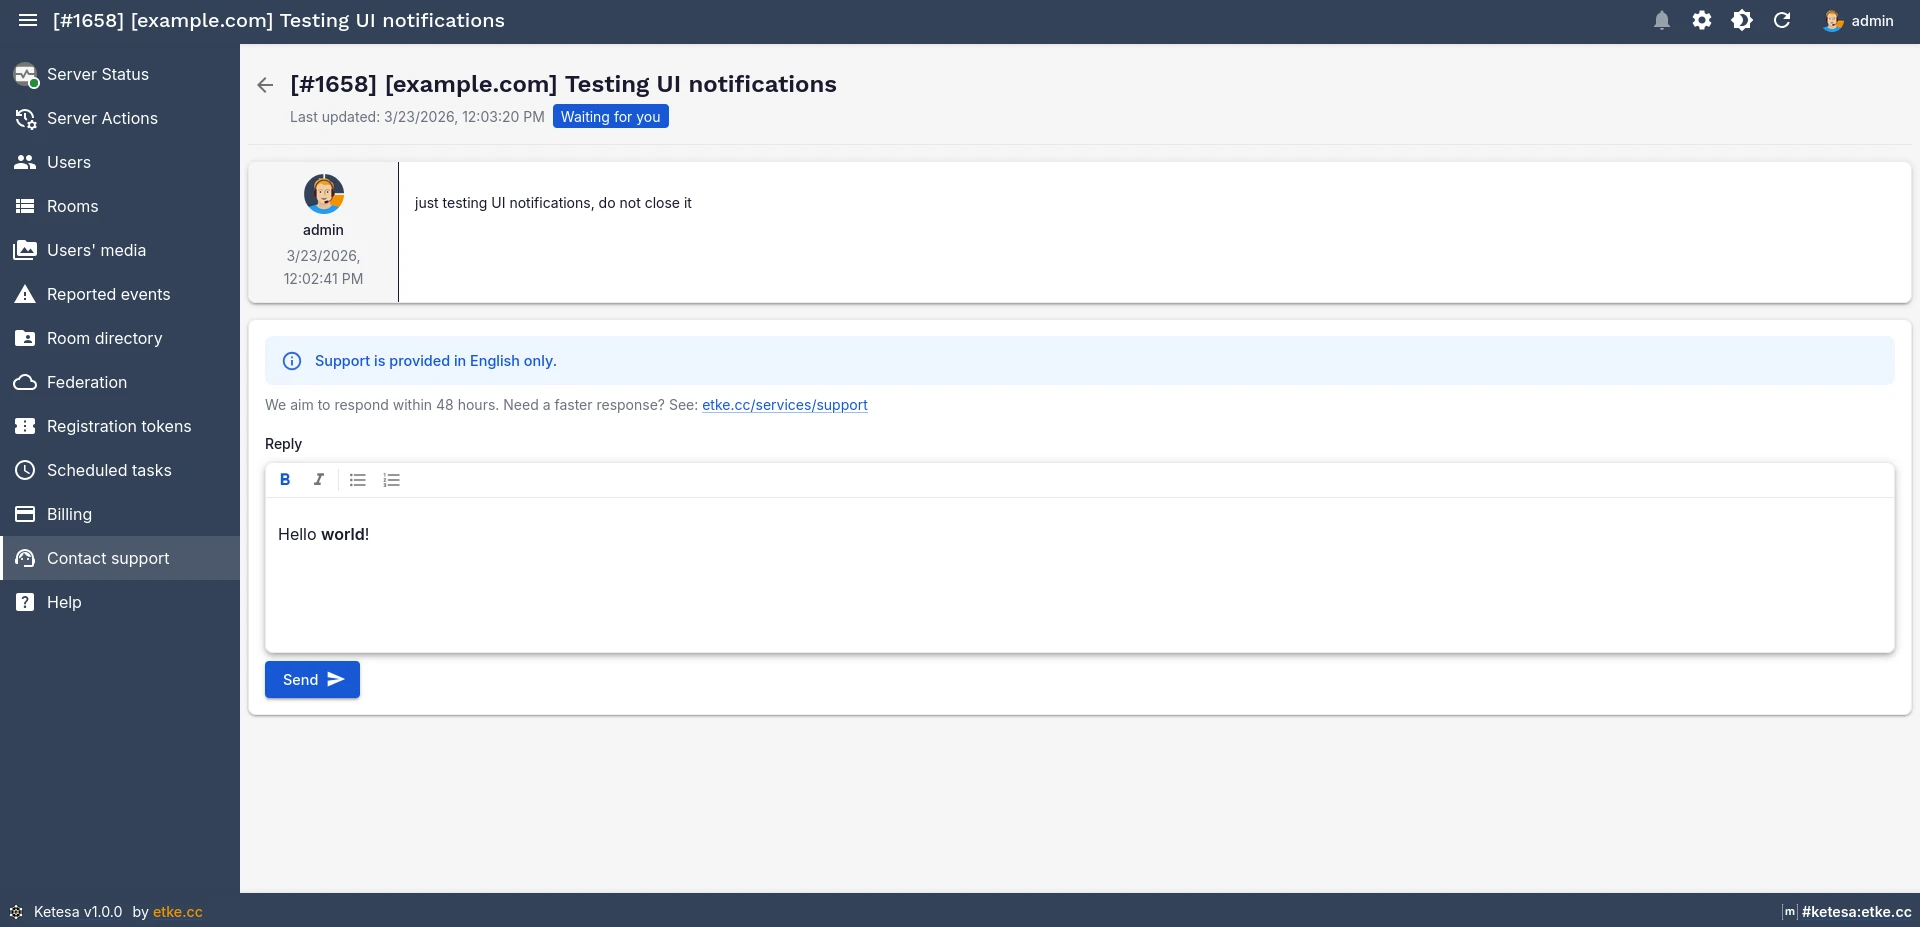
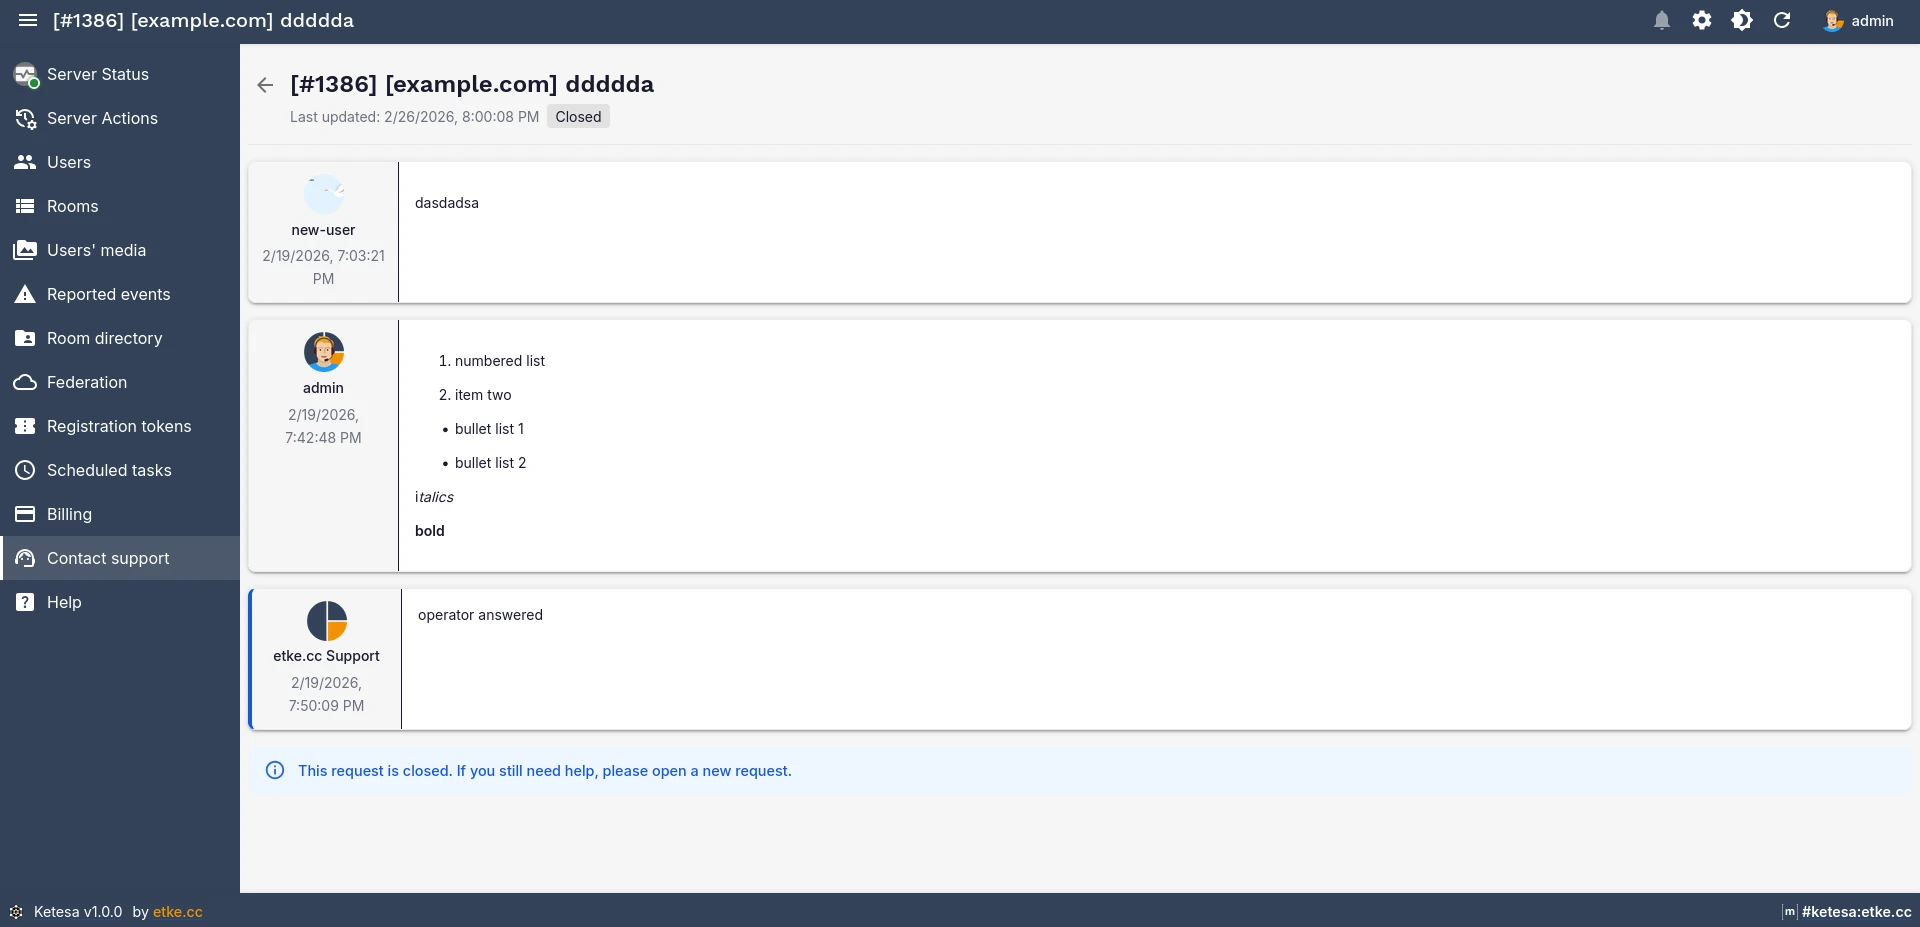
Support
Open support requests, track their status, and exchange messages with the etke.cc team — right from the interface you use every day. No need to switch to a separate tool or channel.
Power up with Ketesa
Start using Ketesa today - get a managed Matrix server with it pre-installed, or add it to your existing setup.